
What is it about 7 layer dip that is so addictive? I remember the first time I had it (my folks weren’t big on Mexican or Tex-Mex food). I was in the Army and all the officers had been invited over to the Battalion Commanders house for a BBQ. His wife had made a 7 layer dip for the party and I couldn’t stop eating it. It was so good that I asked her for the recipe and she sent me away with a hand written recipe card that I still have in my recipe file!
It’s actually quite easy to make this dip, and it can be varied in many, many ways. Like black olives or onions? Add them in! Don’t like guacamole? Leave it out! Want to make your own guac, or use homemade and/or fresh made salsa–that’s fine too!
The problem for me with 7 layer dip is that it is fairly messy to serve. Typically you pile the layers on some sort of platter. It starts out the evening looking very pretty–but by the time two or three people have served themselves it’s a goopy mess (although still tasty of course).
That’s why when I saw little individual dips on Pinterest I got all excited–here was a way to keep the dip pretty! The original 7 layer dip pin I saw showed the dip in clear plastic cups. That was cute, but it seemed pretty wasteful to have all that plastic (although undoubtedly it saves on party cleanup!). I decided to use my own 7 layer dip and put them in small glass canning jars instead! Not only is it more sustainable to use glass that can be washed and reused for something else. . . but it also makes the dips portable since you can place a lid on it. BOTH of the kids (after eating my photography models!) asked if I could make these again soon and send them in with their lunches. I could also see making these individual dips for picnics or tailgating parties.

For my containers I used 8 oz Mainstays brand canning jars from Walmart. These are “jelly jar” sized, but instead of being taller and narrower, they are short and squat. I love the shape and bought several cases when I found them last year–but unfortunately I can’t find them on the Walmart.com website anymore. You can use the regular jelly jars, or you can use the smaller 4oz wide mouth jelly jars (Ball, Kerr etc all have this size). You could probably reuse babyfood jars as long as the mouth was wide enough to fit a chip into. Use your judgement!
To make these individual 7 layer dips you simply prepare all your ingredients (mix, chop, etc) and then layer them into your containers. It’s hard to give specific amounts and results because it will depend on how big your containers are, how deep you make each layer etc.
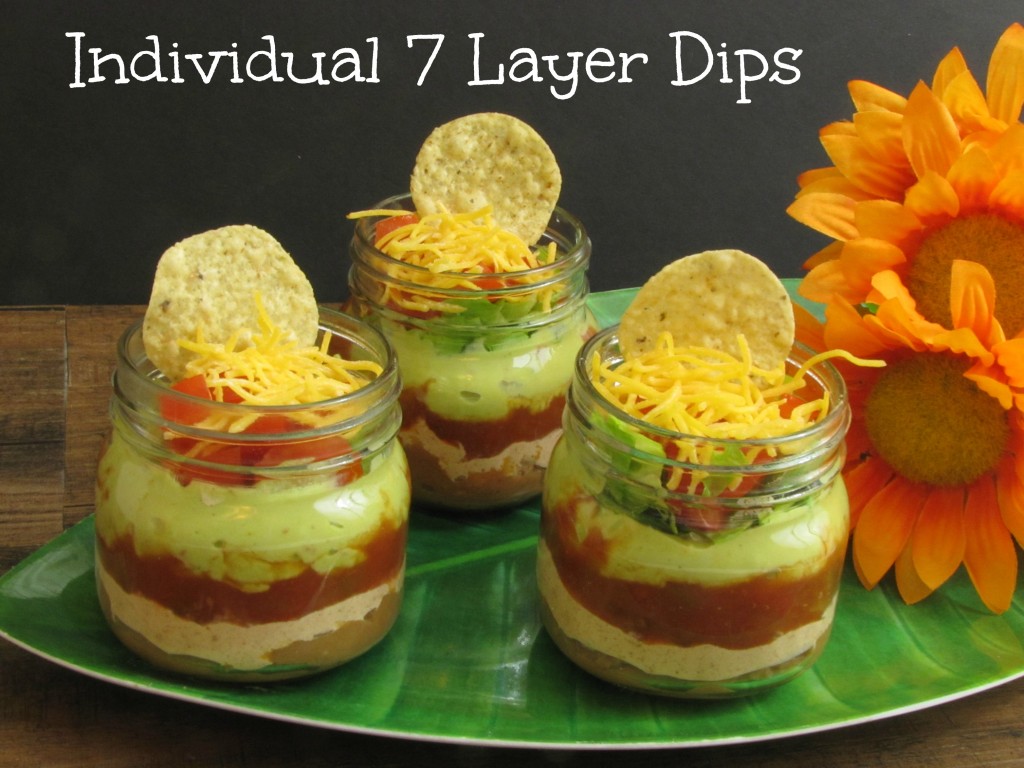
Here are the layers I used, starting from the bottom and working my way up:
Fat Free Refried Beans (canned)
Sour Cream and Taco Seasoning (mixed together)
Guacamole Dip (store bought)
Salsa
Lettuce
Tomato
Cheese
Using a 16 oz can of refriend beans, about 8 oz of sour cream, and a jar each of the salsa and guacamole I was able to make about 12 half pint jars of dip. They had pretty generous layers of each ingredient because I wanted the stripes to look pretty in my photos–you could stretch it out a bit more and still have pleasing looking dips.
note: avocado, the main ingredient in guacamole, will turn a nasty brown when exposed to the air. That’s why guacamole recipes always call for an acidic ingredient such as lime juice, lemon juice etc. I wanted my jars to stay pretty so I used a purchased guacamole dip–I figured that they had added the right kind of acidity to make it stay pretty and green for a long time.
Enjoy your dip making!


Love this idea! We love our Mason jars:)
I am so pleased with how adorable they came out!