I told you recently that I have this bright shiny new gorgeous laptop-that happens to be an inch wider than my previous model-it didn’t fit into my laptop sleeve.
Being the frugal gal I am, I balked at buying a new sleeve. I had just spent over $600 on a laptop, I really didn’t want to spend another $20 for a basic boring sleeve, or even more for a stylish one. I decided it was time to implement an idea that had been bouncing around my brain for a while.
Why not make a laptop sleeve from a thrift store cardigan sweater? Can you believe I searched the internet high and low and couldn’t find any other mention of someone doing this? So I decided to “wing it” without directions.
The next time I was in town for errands, I swung by my Salvation Army. It was “family day” so most of the merchandise was 50% off. I picked up 2 sweaters for $3.99 each. The turtleneck sweater is all natural fibers-I will be using it for a felting project I want to try.
I decided that rather than have the buttons run straight through the center of the sleever that I wanted them to be off to one side-more like an envelope.
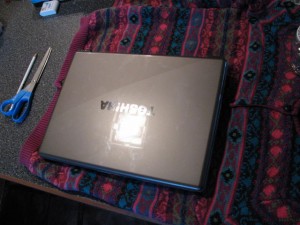
I’m too impatient to come up with a pattern, so I just laid the laptop on the sweater and cut around it with about a half inch to spare.
Next I placed the pieces together-wrong sides together-and pinned it in place well. I did clip off the top and bottom button-they were in the way for sewing. Note: I wanted the sleeve to be completely patterned, so I had planned on the waistband being cut off. I just didn’t bother till after I did the sewing.
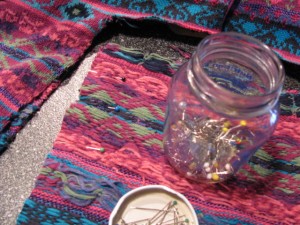
Pinning the pieces together. Yes I do use an old "Grey Poupon" jar to keep my pins in. Have for years.
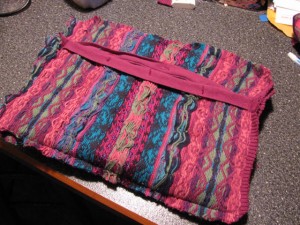
I sewed all the way around the whole thing on my sewing machine. I was concerned that where the seam met the opening there would be extra stress on the stitches so I sewed over that part several times.
Now for the true test. Would it fit? Had I left enough of a seam allowance to take the thickness of the laptop into account? Would the stretch of the knit take care of any problems? I turned my new sleeve right side out, held my breath and attempted to slip the laptop in. . .
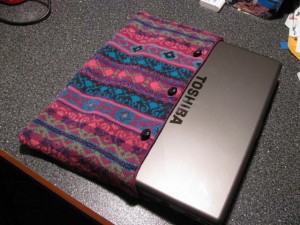
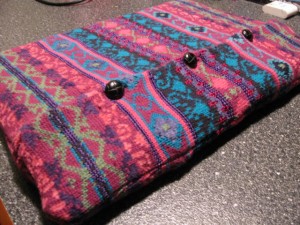
Yay! A perfect fit! I didn’t wind up sewing the first & last button back on-they weren’t needed and were so close to the edges that they would have been difficult to button up.
To finish up the sleeve I turned it inside out and trimmed the seams down a bit. Don’t get too close or it could unravel on you. If you are really worried you could go round again with a short zigzag stitch. I also clip the corners at a diagonal to cut down on bulk.
Isn’t that a unique looking laptop sleeve? And it only cost me $3.99. You don’t have to have a sewing machine to make this-hand sewing would work fine. Just take small stitches-they will be stronger that way and keep the seams from gaping when there is stress on them.
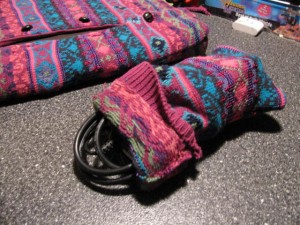
Since my laptop IS so new and shiny, I don’t want to throw my cords in there and possible scratch the case. So I used a bit of the leftover fabric and sewed up a little bag to put the cords in. I know it looks like a piece of the sleeve, but it isn’t (I’m saving the sleeves to make legwarmers for Princess). The cord bag will even fit inside the sleeve-it just gives it a rather mishappen “hunchback of Notre Dame” type look.
And there you have it a simple, cute, inexpensive laptop sleeve made from a cardigan sweater. You could even use this as a gift!





I absolutely LOVE this idea. It is ingenious!
Sweaters can be linty. Lint, if it gets into your computer will do damage. That is why the lap top covers that you purchase are not made of fabric or they are made of a very tightly woven fabric that will not give off any lint. Please do a bit more research into this before you use it very much. My IT husband cautioned me against making a laptop sleeve similar to the one you made (I found directions on the internet from another site) for the reason I gave you.
Aside from that, the laptop sleeve you made looks fabulous.
Love this idea. Mary’s DH may have a point about the lint thing.
Lining it with plastic fabric would fix that and make the cover waterproof, an added bonus for a little extra work, and if you wanted to keep with the recycled theme you could use an old shower curtain 🙂
Great Blog Jen I always enjoy it.
My computer head DH also pointed out that static electricity is an issue here.
All these practical IT DH’s. I guess there’s a reason those computer bags are so expensive. 🙁
Who cares, It looks great and by the time it does any damage the computer will be out of date anyway. right ?
SO. GORGEOUS!! I love it. Hope that you can find an easy way to work with this and de-lintify/de-static it per the commenters above because it is absolutely lovely…
Also, Doctor Who? Quantum Leap? I heart your viewing choices…I think we are TV twins 🙂
how cute! have you thought about making a matching coffee sleeve with some of the leftovers, and maybe adding the buttons you removed?
you would be styling and profiling at starbucks, for sure!
WAY COOL!!!
Now that is just awesome!
Jenn- I love the new layout!!
so cute! I have used this idea to make pillows. I used old denim shirts and old throw pillows. The pattern and concept are the same. Denim might solve the lint issue for your computer….?