
Looking for a cost effective summer vacation that can bring the whole family together? Why not try camping!

Yankee Bill grew up camping–I did not. The first time I ever slept out in a tent was when I joined the Army–and let me tell you, that wasn’t the fun kind of camping. When we married we eventually bought a pull behind camper, so we haven’t really done much of the “sleep out under the stars using a tent” type of camping. With the cost of fuel we haven’t been moving the camper much–it has pretty much become a cabin on our friend’s property.
Once Buddy joined cub scouts he had an occasional camping trip–and now that he’s crossed over to Boy Scouts, well, they do frequent tent camping! Yankee Bill will be going along on these tent camping adventures(which I think is great–I love that Boy Scouts gives them a reason to have special guy time together). Princess, not to be left out, wants to know if she can have some of her friends over either to camp in the backyard or to go up to where we have the camper–where they can sleep in a tent while we use the camper (the better to giggle and gossip without parental interference I think.
Suffice it to say–I see more tent camping in our future!
One of the great things about camping is that the gear is durable–once you purchase it, you can count on years of use! That means that after you buy your initial setup (which doesn’t have to be expensive) future camping trips only require a bit of gas to get there, the cost of the campsite (free to inexpensive) and then of course your food.

Walmart asked me to try out one of their new “instant” tents as well as my choice of some other gear from the outdoor department. Over the years we have already accumulated many of the camping items you would need–even though we were in an RV trailer. We have a two burner propane stove, multiple camp chairs, a Coleman propane lantern, sleeping bags, sleeping pads, coolers, . . the list goes on and on! Not only are these camping items from the Walmart Outdoor department durable, they are also multipurpose. The sleeping bags get used as extra bedding for sleepovers. The camp chairs are used for seating at BBQ’s and sporting events. The camp stove acts as a form of emergency cooking for power outages and can be brought along for tailgating. The coolers get used for camping (yes, even if you use an RV), to hold drinks for BBQ’s, for picnics, for grocery shopping in the summer. You get the idea.
Since I didn’t need any of the basics (besides the tent, which I didn’t have!) I decided to concentrate on the cooking aspect of camping. I love cast iron for camping and home use because it is so sturdy (you can use items that belonged to your grandmother and plan on passing it down to your own grandchildren some day!) and because you can use it on a regular stove, a propane stove or over an open fire without doing any damage to the cookware! I have several skillets and bought myself a Lodge Dutch Camp Oven and Dutch Oven Lid Lifter last year–so I picked up the Lodge Double Sided Griddle, the leather gloves (good up to 400 degrees!) and a Lodge Cookbook. I also picked up four Camp Forks!
Let’s start with the Ozark Trail 4 Person Instant Dome Tent.
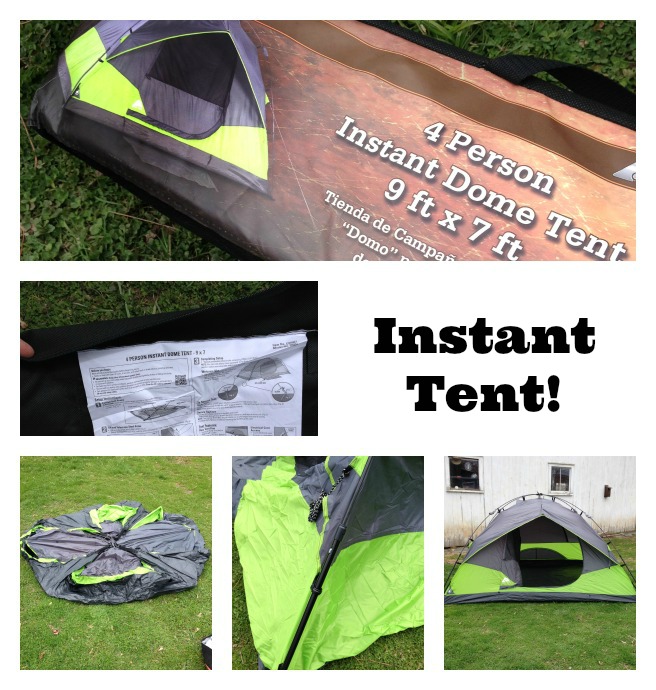
The first awesome thing? You can’t lose the directions for setting up the tent because they are sewn into the bag that the tent is stored in. Smart! Following the directions was simple–when they say easy up, they weren’t kidding. Seriously. You pull the tent out of the bag and sort of lay it out. Then you flip the poles out from the center (they are sort of jointed) and telescope them open. There is a button that locks them in place (and that you push in to reverse the process when you pack up). Then you just stake it down on the corners, pull the guide ropes out and stake them as well. I honestly set this up by myself in less then 5 minutes on a windy day in my backyard. I couldn’t believe it. I left it set up for 3 days. It was windy and we had a terrible thunderstorm one night–the tent stayed put and stayed dry. I thought that was pretty awesome.
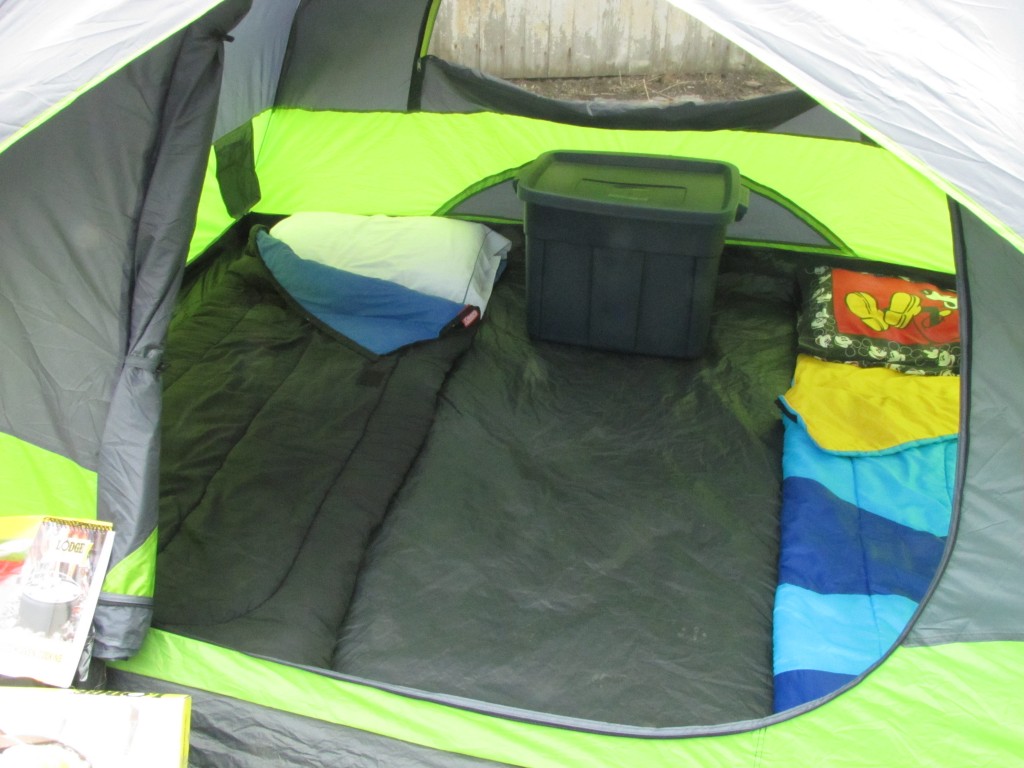
The tent is listed as a 4 person tent, and if you were super friendly and slept side by side you could fit 4 sleeping bags in there. However I think most users would find this most comfortable for 2 folks as I have it set up here–two sleeping bags and then room for some gear in between. I’ve got a nice tub I bought at Walmart that would be perfect to store some of your food stuffs in for transport and for safekeeping at the campsite.
When it was time to take the tent down it was the same easy process, just in reverse. I had it done in about 10 minutes total (it always takes a big longer to fold something up compactly!)
The extra bonus about this tent? Right now it’s on rollback for $59.97!
Now that we’ve got someplace to live, let’s talk about the really important stuff. Food! For camping food planning, storage and cooking is very important. A full rundown is beyond the scope of this post–just be aware that having good coolers, starting out with some items frozen (so they can defrost during the trip) and being able to replenish your ice are important to food safety. Since space can be limited, doing dishes is a pain, and you don’t want to spend your whole trip cooking–planning is key!
To try out my new cast iron griddle I decided to make pancakes. That’s one of those awesome camp breakfasts–somehow eating fresh, hot pancakes out in the open air. . . well, it just makes them taste better. The cast iron griddle worked like a charm on the two burner propane stove in my backyard “simulated” campsite–but it would have worked equally well placed on top of a charcoal grill or securely balanced over a wood fire. When using cast iron it is best to have a thin metal spatula.
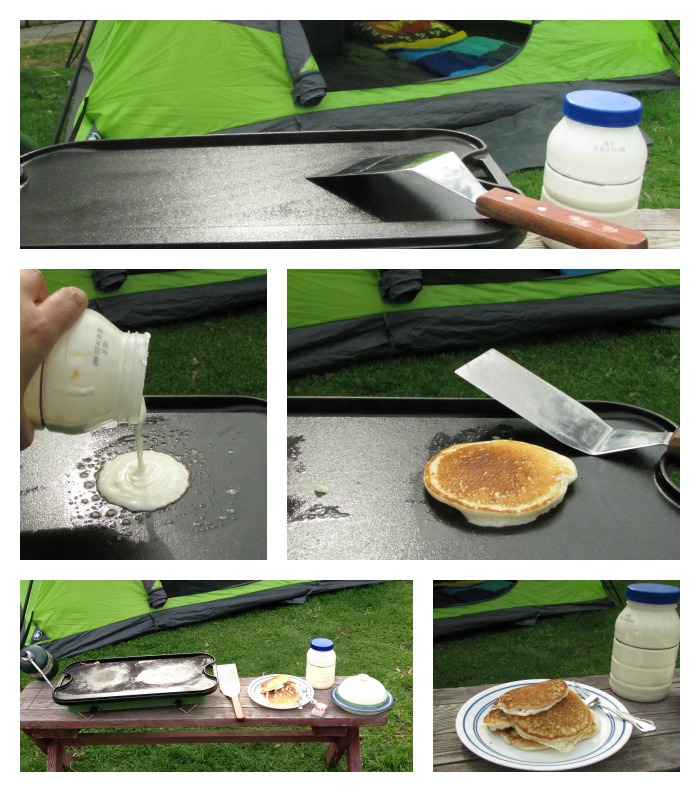
Notice that I’m pouring the pancake batter from a jar? More on that in a minute.
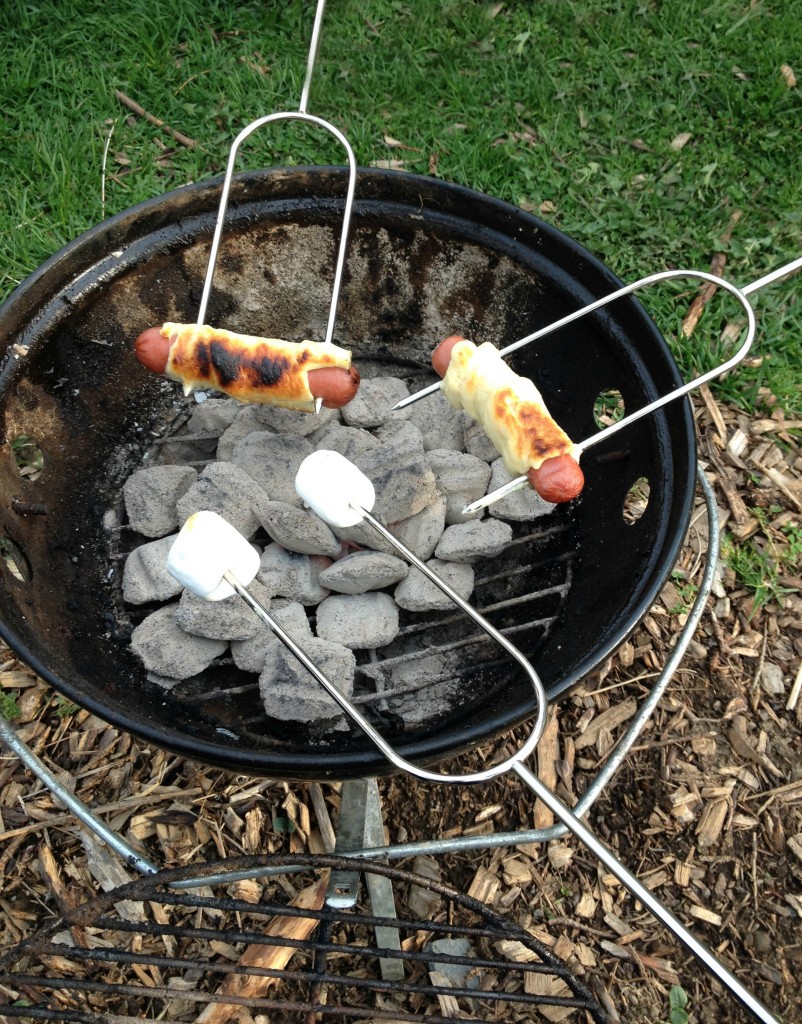
For my second cooking adventure we used the camp forks (which were only $2 each by the way!). Of course you have the classic roasted marshmallows, but to make it a full meal we made campfire dogs–hotdogs wrapped in crescent rolls! You have to pull the dogs off and flip them over half way through cooking, or the part of the crescent roll facing you never gets cooked. (note: there is a ban on open flames in my town until after May 15–so we had to use charcoal in my Weber Smokey Joe Kettle Grill)
Finally, back to the Pancakes in a Jar! Here’s how to make your own frugal version of those shake and pour pancake batters. You will need a jar (an empty mayonnaise jar works well), and you will have to make a batch of pancakes at home to figure out the markings. Here’s how:
Pull out your favorite cookbook and look up the pancake recipe–I like the one in my Better Homes and Garden cookbook that makes about 12 cakes. Don’t worry, I’ll give the full recipe at the bottom of the post.
To make your recipe “shake and pour” start by measuring all the dry ingredients into a bowl. Instead of using oil, change your recipe to shortening. Add that to the dry ingredients and rub it in until the mixture is all crumbly and you can’t see any individual shortening. To reduce the need for milk, I changed my recipe to use powdered milk–so I added the powder to the dry ingredients. Now pour all the dry ingredients into your jar. Add in the liquid called for by your recipe at this point (water, because it will combine with the powdered milk to form milk). Mark your jar with a permanent marker to show the level that the liquid comes up to. Now add in your egg, shake and make your pancakes to enjoy at home.
Wash and dry your jar. When it is fully dry measure out a new set of your dry ingredients (including the powdered milk) and rub in the shortening. Pour it all into your jar and cap tightly. When you want to make pancakes at your campsite–just add water up to the line you marked (no need for measuring cups!), crack in an egg (or skip it if you don’t have one), shake and pour! That’s it! Save the jar for the next trip or toss it in the recycle bin on your way out.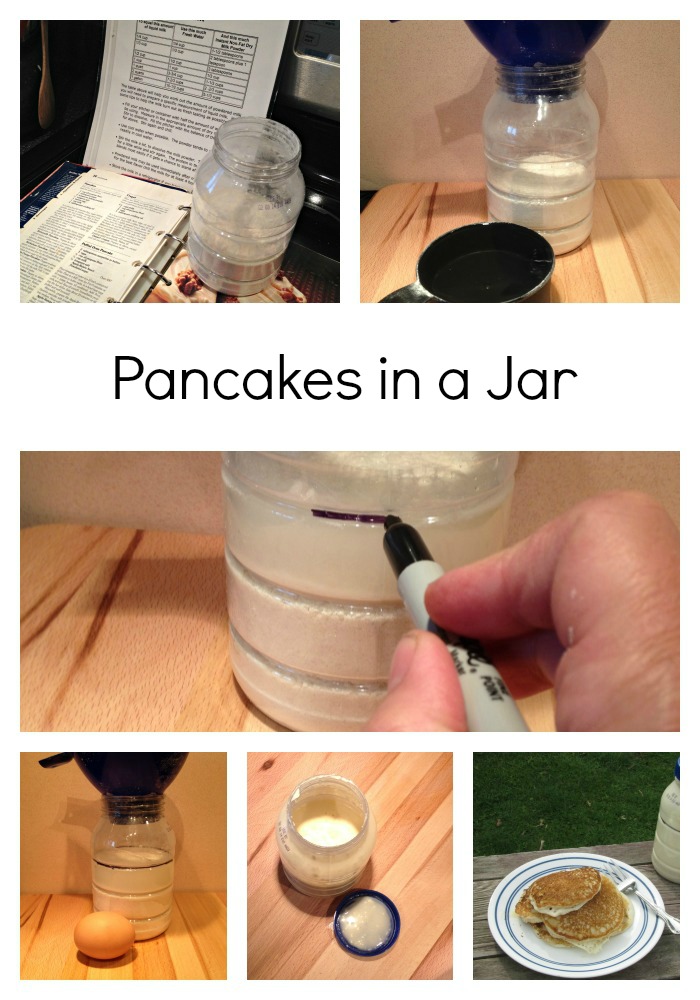
Pancake in a Jar
Ingredients
- 1 C Flour
- 2 TBS Sugar
- 2 tsp Baking Powder
- 1/4 tsp Salt
- 1/3 C Powdered Milk
- 2 TBS Shortening
Add
- 1 C Water
- 1 Egg
Instructions
-
Combine all dry ingredients and mix well.
-
Rub in shortening until it is fully incorporated (you can use a food processor)
-
Place dry ingredients in jar and cap.
-
To make pancakes add 1 C Water and 1 Egg.
To prepare jar for the "no measure" method.
-
You will have to prepare a batch of pancakes at home. Place all the dry ingredients with the shortening rubbed in into a jar. Add the 1 cup of water and then mark the level on the jar with a permanent marker. Add you egg, make the pancakes. When the jar has been washed and dried make the dry/shortening mix again and place it in the jar. At your campsite just add water up to the line, crack in an egg and shake.
****This is a sponsored post****
 Disclosure: As a participant in the Walmart Moms Program, I’ve received product samples and compensation for my time and efforts in creating this post. All thoughts and opinions are my own.


Leave a Reply