I love flowers. There is just something so lovely about adding the beauty and life of flowers to your home. But as a frugal gal, when I have those little internal conversations with myself, I can’t often justify spending the money on something that I know will only last a limited time and then be gone.
Sometimes though my sweet husband surprises me with a bouquet for no reason, or I am at Aldi’s and splurge on the bouquets that they sell (which are very nice for the price).
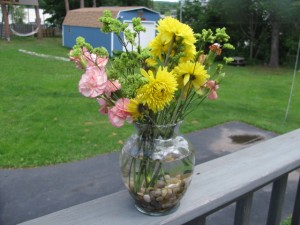
Then I get it home, strip all the lower leaves off and pop it in a vase with some “river rocks” from the dollar store* and it looks something like this:
(Note: these flowers were actually a given to me when my Husband, MIL, Mom & Grandfather attended my show)
Hmm, somehow they looked a bit fuller in the plastic sleeve. But never fear, you can take that supermarket bouquet and make it look like a million bucks without spending a fortune! First we need to find some free filler to improve the arrangement. It’s spring, so let’s take a trip outside.
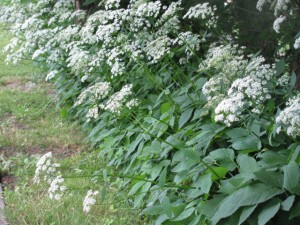
Queen Anne’s lace is considered a weed around here-it grows EVERYWHERE. It cracks me up that they actually sell it as a filler flower in florist shops. Ditto for Goldenrod in the fall.
So I’ve collected a nice little pile of additional greenery in various colors, shapes and sizes. Now to add it in to my bouquet.
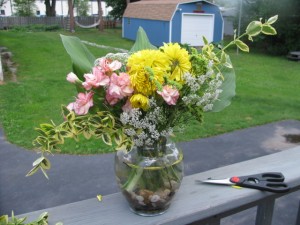
I like to hold the piece up to the vase in order to judge where to cut it.
Next I strip off the lower leaves (when necessary). Our goal is only to have stems below the water line in our vase. I always like to do everything I can to make flowers last. The easiest is to remove the lower greenery-leaves sitting below the waterline will start to rot creating a nasty smell and bacteria that will shorten the life span of your bouquet.
I just keep popping in stuff till it looks right. Yeah-I know, that’s so technical! Well I’m not a professional flower arranger or anything.
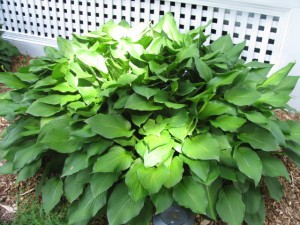
I do know that odd numbers look better (things aren’t even in nature you know) so I use 3 Hosta leaves in the back of the arrangement. I also know that “levels” look good, so I aim at having some of that variegated stuff going both high & low. Lastly I use the Queen Anne’s Lace to fill in any open spots or gaps.
Viola!
Now in my “clipping” routine I wound up with some flowers that would have been too low in the vase (those carnations have a lot of side branches), a broken off flower or two and of course some leftover filler materials. So I decided to make a little posy out of the “leftovers”.
Now they need to go in water in order to last, but it’s got to be something with a pretty small neck so the posy stays together.
I found this little ketchup bottle I had picked up on a trip (it had ketchup in it at the time). It really doesn’t look that great, so I searched some more and found a small terra cotta pot I could hide it in. I have no idea where the pot came from-a kids school project maybe?
The finished products:
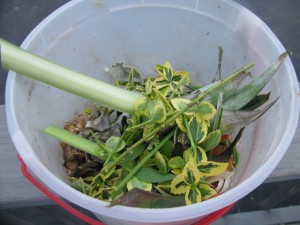
Now I’ve got a bunch of leftover bits, so those are thrown into the compost bucket.
The bouquet’s came out so nicely that I decided to go out on a limb and make an entire arrangement from things in my yard.
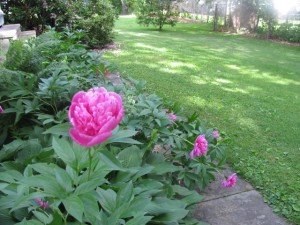
I started with my Peony bushes.
I love the Peony flowers but am not so fond of how they look when they fall over. I have made my own inexpensive Peony supports, but forgot to put them in this spring. So over they went once the buds started blooming! I clipped several of the ones that were already lying down and stuck them bloom first into a full bucket of water to “de-ant” them. (Ants LOVE Peonies). I added in some greenery-hostas, a fern (also growing around my porch) and some of that variegated stuff (someone, please, tell me the name!).
I popped it all into a bud vase and was very, very pleased with the results.
So there you have it! Now you too can dress up an inexpensive supermarket bouquet. Don’t forget to also check out my inexpensive Peony supports project and my post on how to make cut flowers last.
*note: I rinse, dry & save the rocks and use them over & over







Wow you really made those flowers look beautiful! 🙂
Especially love that little potted one! I think Ill try this for my luau in 2 wks!
You always have such great tips! (Still waiting to see the magazine baskets! 🙂 )
I don’t know what your variegated stuff is, but I can tell you that ants don’t just love peonies, they’re necessary for them to bloom: the ants eat the waxy stuff off the buds, allowing the flowers to bloom. You can’t have peonies without having ants…(which is a big reason I’ve never planted peonies, as I battle the little critters already!)
Your flower arrangements do look very pretty. If you ever get tired of the “river rocks,” you can also use marbles for the same purpose — I have a bag of clear glass ones (because they go with everything) that I use for “vase filler.”
The variegated creeper appears to be euonymous. There are many varieties, the groundcovers like you have (which I also have and just love) and there are also shrub varieties.
Hi Jenn.
That “stuff” by your mailbox is called euonymus. I only know this from having purchased some at my local nursery a few years back when we ripped up all of the stuff in front of our house and planted all new.
Great looking flowers, btw! I see another side job here…. 🙂
Anne
Thanks to Mary Ann & Anne (it must be an Ann thing) for identifying the euonymous.
Topaz- Hey! Long time no see! Thanks for dropping by. I didn’t realize the ants were necessary to Peonies-that is very interesting. I am considering planting more of the bushes out back so I can use them for cut flowers during the summer-the buds can be cut & stored in the fridge, then will bloom when you take them out. Oh, and good tip on the marbles-I used to have those too but they have disappeared into the kiddo’s rooms. . .
Corine-Glad you liked them! And don’t worry, the magazine bowls are coming soon. . .
I like Queen Anne’s Lace too. I had it in my wedding bouquet. I think I’m going to plant it in my garden bed as a regular plant.