
This fall I decided that I was spending far too much money purchasing ferns and geraniums each spring-there had to be a better way.
And there was! It’s called overwintering, and it is what our grandparents most likely did with their plants.
My plan for overwintering the Boston Ferns was simple-give them a “haircut” move them inside to our mostly unheated but bright front entryway and mist a couple of times a week with water to keep the humidity up.

Hanging in the front entry
Well, that was the plan anyway. What I wound up doing was moving them inside and making a note to remember to water them about a cup every 3 or 4 weeks. I didn’t trim them and I totally forgot about the misting thing.

Hmmm, doesn't look so hot up close.
Despite my benign neglect they seem to be doing ok. As in they are still alive if turning a bit brown in places and dropping leaves. I took the one farther away from the window (let’s call him Harold), finally gave him that haircut.

Lots of trimming went on here-but it still looks pretty decent.
Then I moved him to the master bathroom (which has a humidity problem). It may be just my imagination, but I think Harold seems happier. I was so inspired that I gave the other fern a haircut (let’s call him Gerald. Gerald & Harold just seem to go together) and moved it to the master bath as well.
Since it’s the end of February now, and I should be able to start putting them out (at least in the daytime) in May. . . I think they are going to make it! That’s about a $25 savings.
My plans for overwintering the Geraniums was a bit more complex. My research showed there were several different ways to go about it-so I was going to sort of split the difference-try a couple as houseplants, have a couple go dormant in their pots and take a couple out so that they would go dormant as dry roots. Then I planned on taking cuttings and propagating some more geraniums.
So what actually happened? Well I put them down at the bottom of the basement stairs temporarily in October so that I could get around to setting them all up. . .
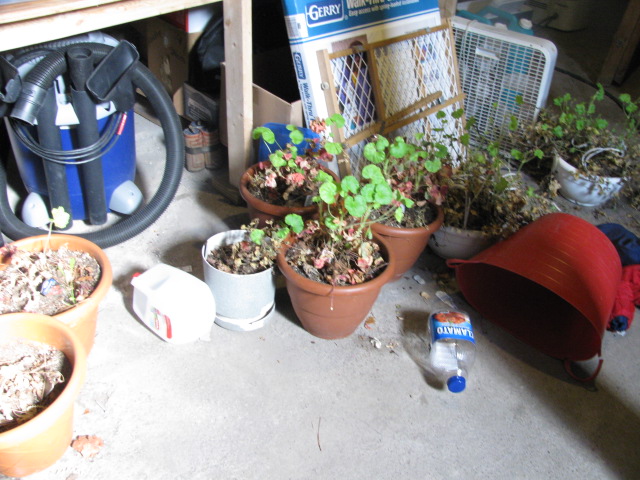
This is right at the bottom of the stairs. . .
And there they sat.
In my husband’s way (sorry Bill!)
The dang things are INSANE. It’s about 42 down there with weak watery light (that photo has the overhead light on-there is usually less than that) and they have been growing, and putting out buds. One actually flowered.
So finally I went ahead and cut out the dead growth.

That looks a lot better!
And I took those cuttings I’ve been meaning to and with the help of some rooting hormone and seed starter potting mix I’m trying my hand at propagating.
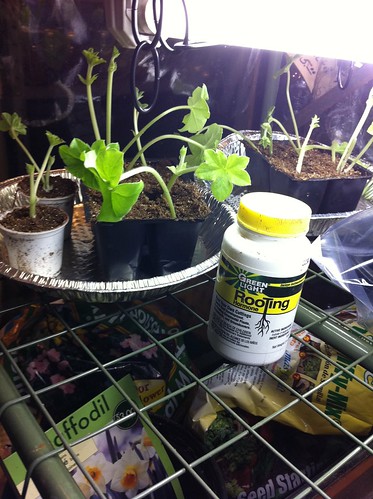
They look good now-I hope they look good tomorrow.
The pots themselves were watered and moved to a very dark corner of the basement to go dormant for a couple of months. I really do think they are going to make it! If I can revitalize the 2 hanging geraniums baskets ($16 ea) and the 5 other geranium pots (about $6 ea) I’ll have saved about $60.
Not to mention the savings if those cuttings actually grow!
What were the keys to my completely neglectful success? I think it is remembering to water them just a bit-but not to overwater. I went ahead and set myself calendar alerts in Google Calendar and have actually remembered to water them lightly (about 1cup) pretty much on time times and fed them once (again a calendar alert) with a very weak fish fertilizer dilution.
So far for this update I’m cautiously optimistic!


Hi Jenn,
I winter my geraniums every year. I trim back all the long growth to about 8-10 inches. I place them in a window in my basement and forget about them. I take them out as the weather starts to warm up around Mother’s Day. Repot, water them, and strip off all the dead leaves. I bring in at night if there is a danger of frost. Any pieces that are oddly shaped or too long go into my window boxes.
Regina-unfortunately we don’t really HAVE any windows in our basement-and by now with all this snow we’ve had they would be covered anyway 🙂 I can’t wait to take them out and dose them with some fertilizer in the spring though and see how mine do. I’m quite proud of myself-in case you couldn’t tell 🙂
I brought in my geraniums this year and have been treating them as regular houseplants in a south facing window… mine were already huge in great big pots (I had one on each side of my garage door) so I spent quite a bit on buying new ones yearly…. Mine have grown more full and bloomed all winter long, they seriously have never looked better… will be interesting to see how they transition outdoors this spring.
Melanie~Doesn’t that make you feel so smart & frugal! Just take your time acclimating them this spring. . .
Can I take fern out of pot, just over winter bare rooted?
I have never tried that Tom, so unfortunately I can not offer any advice